
Release Notes – May 2016
Order & Quote Entry System
- Sort Option added to Inquiry – Order Shipping Inquiry – This inquiry now allows users to view this inquiry by Date Shipped. The Date Shipped is located in the Shipper Information from within a Sales Order. The Date is filled in automatically for UPS Shipments if you have the optional UPS Integration module. This inquiry is the last menu item in the Order Reports Menu.
- New field for export – Ship Schedule by Cust-Part-Date will now include PO Status. This is useful for companies that tie Sales Orders to Purchase Orders for direct ship orders. If the status shows as received, technically it should be billed to the customer.
- New Feature Duplicate Order from Order inquiry – When in an Order Inquiry an Order can now be duplicated. This new feature is located under Options. This feature is often used to duplicate a Quote so that you can retain the original and edit the duplicated document for shipment.
- New Flag – Days Added to Order Import Date Requested – When importing VMI Orders, the system used to automatically fill in the Current Date as the Date Requested on the Order. There is now a flag that can be set to the number of days you would like to add to the current date to create the Date Requested. This flag is located in Entity & System Flags – Order Entry, Screen 7 of 7.
- New Feature – Move Unallocated Lines to new Order – When Allocating a Sales Order Users now have the ability to Move unallocated lines to a new order from within the Detail Lines of an Order. This will bring up a confirmation box to verify that you want to move the unallocated lines, and then take you into the new order.
- New Feature Duplicate Order from Order inquiry – When in an Order Inquiry an Order can now be duplicated. This new feature is located under Options. This feature is often used to duplicate a Quote so that you can retain the original and edit the duplicated document for shipment.
- New Optional information in the graphical interface – Users can now view Customer Item Instructions that are setup for an Individual Customer/Product in a new Optional Information Grid available when in an Order Detail Line.
- New Inquiry – Closed Order Inquiry – This new inquiry will present all Closed Orders within the date range selected. The Line Items on the Order will be show as well as the User, Date and Time the Order was closed.
- New Field – Default Customer Job Number has been added to the Customer Master file, when this field is filled in, it will automatically copy to the heading of the Sales Order.
- New Field in Customer Order Inquiry – In the graphical interface when viewing Open Orders for a Customer a column has been added for Packing List Printed. When selected it will show the User, Date and Time the Packing List was printed.
- New Report – Customer Bin Turn Report – This new report can be generated by Customer and Invoice Date Range. The report shows all the active customer bins, and then for the given date range: the quantity sold, # times sold, and # of turns (based on Bin Minimum). It also shows bin information, and inventory availability. This report is located in Accounts Receivable, Customer Bin System, VMI Reports.
- New Report – Documents to be Picked – This new report is similar to “Print Picking Tickets Not Printed” and the “Pick List Report”. This report would be used to help decide which documents should be printed to be processed. This can include Orders, PPO’s and Transfers. After selecting / deselecting the documents, pick tickets will be automatically printed.
The options for the report are shown on the screen below:
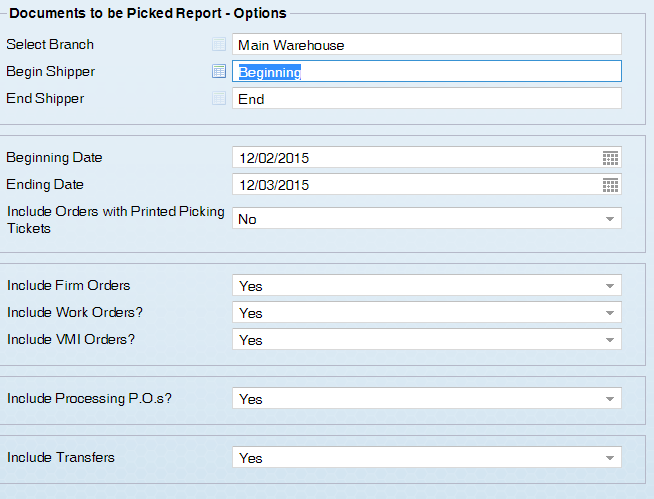
The shipper range is so the user can run the report for a specific shipper (like UPS) so you can “batch” the orders going through the warehouse. Will Call and Customer Waiting should go out first, and then truck shipments, and then UPS shipments. Leaving the default as Beginning and End simply includes all orders.
The Beginning and Ending dates are the Date required based on the document dates. For PPOs and Transfers, they are the date the PPO and Transfer are due.
If you answer Yes to Include Orders with Printed Picking Tickets, then the system will include those orders in the list. Typically if you have already printed the Pick Ticket you would not need to re-print it.
The sorting program will go through all the orders, PPOs and Transfers that meet the criteria and put them in a grid. Any document that can be fully picked will automatically be added to the list of picking tickets to be printed. In the grid, the user can add/remove individual documents to be printed, clear all documents, print a specific picking ticket, and drill into the document for further information.
When they exit the grid, if there are documents marked to be printed, they will be prompted to print the picking tickets.


Purchase Order System
- The Brighton-Best part number will no longer be shown as a static line below Product Code. Instead the information will be available in a new optional information grid for electronic vendors. This will include Brighton-Best and Kanebridge parts that have relationships setup. As new electronic Vendors ae added this area will expand.
- New Optional information in the graphical interface – Users can now view Vendor Item Instructions that are setup for an Individual Vendor/Product in a new Optional Information Grid available when in a PO Detail Line.
- New Optional Information Grid – When in a Debit Memo Inquiry – Users can now select to view Detail Lines, Output History and the Ship To Address Information in a Debit Memo Inquiry.
- Automatic Replenishment change – The ARS (when Traversing Bill of Materials) will now suggest replenishing the raw material when it is suggesting a PPO for the finished good. Users will no longer have to run the ARS multiple times. The quantity of raw material that is suggested is based on the quantity the ARS is suggesting to replenish of the finished good.
- New system flag – Entity & System Flags – Purchase Orders (4 of 4) Mark PO Delivered Method 2 options:
1. Mark Entire PO Delivered (what it has always done).
2. Input Vendor Packing List Quantities
Changing between these at random will cause confusion. If the flag moves from option1 to 2, then you will need to go through all the delivered PO’s and mark which lines are delivered -otherwise the system will show that the PO is delivered at the heading level, but none of the items in reports will be marked as delivered.
If you have it set at option #1 (the default), when you mark a PO as delivered, it marks the entire PO as delivered – you get a “Delivered” note in open documents.
If you have it set at option #2, when you mark a PO as delivered, the system will also prompt you to put in the vendor packing list quantity for the lines that were received. Only the lines with vendor packing list quantities will show as being “delivered” – the following screen shot shows that line #2 of PO 83940-06 has only been partially delivered.

Processing Purchase Order System
- New Columns added to PPO Inquiry when in a Product Inquiry – Original Promise Date, Current Promise Date and Product Description are new columns in the graphical interface.
- New columns added graphical interface only – When receiving a PPO you can now select the Extra/Non Stock Description, Line Comment and or Internal Comment as columns on the screen.
- New Columns added to report – Open Processing Purchase Order By Vendor has 5 new column in the graphical interface or exporting to excel. Next Document Type, Date, Code and Name. Based on the open documents, this will be filled in with the document information (sales order, outgoing PPO, etc) that the PPO is needed to fulfill.
Inventory
- New Columns when doing a Product Inquiry – the logic for available quantities has been improved. When doing a Product Inquiry the columns on the screen will now include On Hand, Allocated, Reserved, In Warehouse, Committed, Available to Sell, Coming In and Available to Promise.
- New fields added – The Product Entry inquiry is an easy way to check on new Products that have been added to the system. This inquiry will now include additional columns that can be viewed – Classification Code, Classification Description and Weight will be available for all systems. Stocking values are available for all non-branch systems.
- New Menu – Supply Chain Network – This menu is the last choice in Inventory Reports. This menu will contain The Brighton Best Product Lookup, Kanebridge Lookup, XL Screw Lookup as well as the Fastener Connection Product search. This menu will expand as we continue to add Vendors to the Supply Chain Network.
In the Graphical Interface there is also a new selection under Inquiries called Supply Chain Network where there are Product Lookups for the Vendors we are partnering with.
- FCH Connection – New menu items & options.
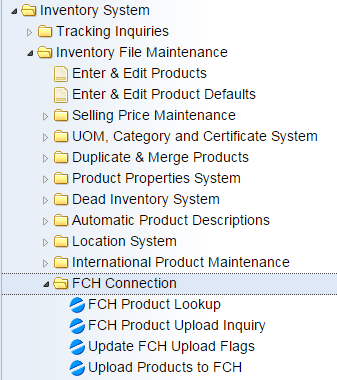
FCH Product Lookup (also found in the Inquiries toolbar menu in the Supply Chain Network sub-menu)
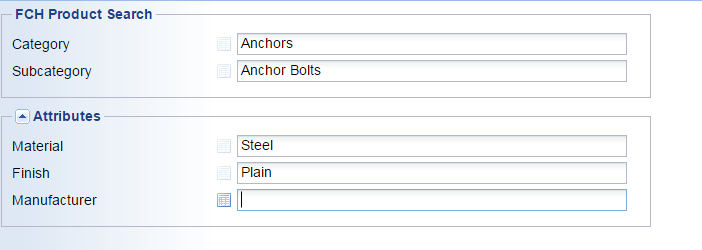
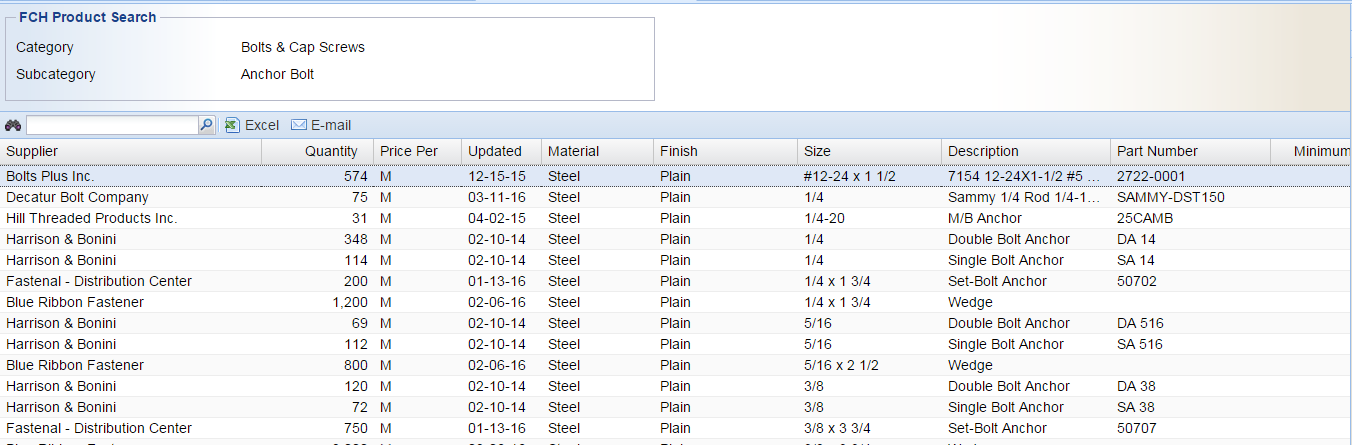
Use the “Download FCH Attributes” to get a fresh download of FCH Attributes. This can be used to search for inventory on the FCH site. Key in text to search for or select an attribute or any combination. See the example below.
Below are sample screens if you are uploading products from your inventory to the FCH Website. You must be signed up with FCH in order to use the upload feature.
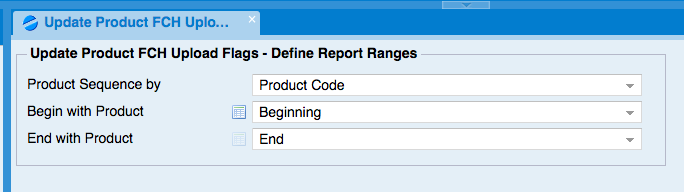
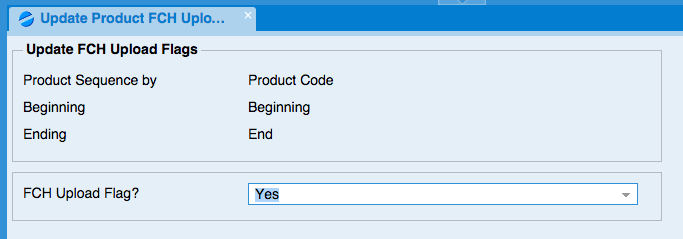
Update FCH Upload Flags
Select a range of products that you want to affect then select how you want the flag set.
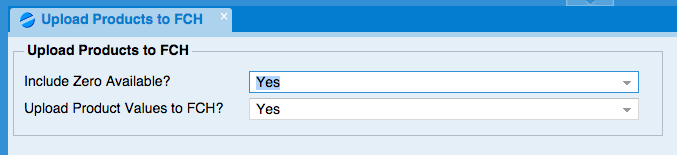
Upload Products to FCH
Use this to upload your current values to FCH.


Accounts Receivable
- New – Customer Annual Sales Summary – this new inquiry is available in the graphical interface – Customer Inquiry, Invoices & Checks. This will present a grid showing by year the Annual Sales, Cost, Change is Sales both dollars and percentage from year to year along with the number of line items, total profit and profit percentage. This will go back to the Customers first sale.
- New flag Default – When creating Periodic Invoices there is a question – Show Customer Selection List – The default for this question was No, this has been changed to yes. Now Users will be able to view the Customers that the system is going to create Periodic invoices for before proceeding. This will prevent Users from accidentally creating invoices they did not want to create.
- New Optional Feature for Periodic Invoices. There is a new system flag Create Single A/R Invoice for Periodic Invoice? When this system flag is set to Yes the system will create a single Periodic Invoice for your customer. When this new flag is set to Yes the system will create a single invoice that totals all of the periodic invoices that were created. The invoice number will be the letter P followed by the Date and Customer Number, example if you created an invoice for Customer # 1234 on March 13, 2016, the invoice number will be P160313-1234. You can then simply pay the individual periodic invoice. All of the invoices that were included on the Periodic Invoice will be listed under paid invoices and the check number will be the Periodic Invoice Number.
Single Periodic Invoices cannot be canceled once any type of payment or adjustments has been applied so it is important to be sure all invoices are correct before creating the Periodic invoice.
- New Flag – Confirm UPS Worldship data during Invoice creation – There are 3 options for this new flag – Confirm, Do Nothing or Required. If your company has the optional UPS Integration Module, Users will now get a warning when creating an invoice that has a Ship Via of UPS without UPS Tracking information when this flag is set to Confirm. If this flag is set to required they will not be able to create the invoice without Shipper information.
- New Flag – Save One-Time Ship to Address as New Address? When entering a One Time address in a Sales Order Users have an option to save the address in the Customer Master file. When this new flag is set to Yes that will be the default answer for all users. This flag is located in Entity & System Flags – Order.
- New Fields added to the Customer Inquiry – The Customer Group and the number of Products with Contract Prices the Customer has been added to the main screen of the Customer Inquiry.
- Fields added to Customer Selection Grid – these optional columns now include Customer Classification Code and Description as well as Customer Group Code and Description.
- New Output Option for Customer Credit Report – This report can now be presented to the screens so that it can be exported to Excel. This report is located in Accounts Receivable Reports, Customer Status Reports.
- New Columns added to Customer Detail Sales History from within a Customer Inquiry – Last Receipt Date, PO #, PO Line Number and On hand balance.
- New information in Customer History – Graphical interface only – The history section has been split into 2 sections – Financial History and History. In the History accordion there is a new On Hand & Usage Inquiry that will show the on hand values and usage of items that have been invoiced to the selected customer.
- New option – Periodic Invoices can now be generated by PO Number in addition to Customer and Customer Ship to Address.
- New Field in Customer Master file – Inside Salesperson – There is a secured flag that needs to be turned on to use this new field. Inside Salespeople Codes are entered in the Salesperson Maintenance System located in A/R File Maintenance. Once they are entered they can be assigned to Customers in Enter & Edit Customers. The inside Sales person will show on the main Customer Inquiry screen. It will be added to some reports as an optional column as requested.
Accounts Payable
- New Feature – Vendor Certificates – An unlimited number of Certificate Types can be setup for Vendors. Examples might be ISO, Liability, Workman’s Comp or AS9100. If your system had the ISO Certified Flag set to Yes they will automatically be setup with an ISO Certificate with a blank expiration date.
- Certificates can be added to the system in Accounts Payable File Maintenance, Enter & Edit Vendor Certificates. They can then be added to the Vendor in Enter & Edit Vendors – Vendor Certificates under Options. When adding a Certificate to a Vendor, an expiration date and comment can be added.
- When there is an expiration date, a pop-up window will appear when Users select the vendor. A listing of expired certificates can be viewed in Accounts Payable Reports – Vendor Expired Certificate Report.
- New Optional Information Grid – In Vendor Inquiry Users can now choose to view Vendor Default e-mails.
- New columns in List Vendors – ISO Certificate, Expiration Date and Certificate Comment have been added to the List Vendors report found in Vendor Lists & Labels.
General Ledger
- New Option in Balance Inquiry – When viewing the General Ledger Balance Inquiry there is now an option for Summary. Users can choose by Month or Year. Balances will be displayed for the selected option. In the past the balances were only presented by Month.
Sales Analysis
- New fields added for export – the following fields have been added to the Customer Detailed Sales by Product grid: Classification Code, Classification Name, Primary Vendor Code and Primary Vendor Name. This report is located in Customer Sales Analysis.
Utilities
- New My Menu Option – Duplicate Users My Menu – This new option will copy the My Menu settings from one user to another. They will then each have unique My Menu’s that can be further edited for either User independently.
- New Subject option for invoices – When e-mailing invoices there is a new option for the subject line. Ship To Name, Document Type, Document Number. This is setup in the Forms section related to Documents. If you would like to change this contact Client Support for assistance.
VMI
- When using Production Cells, there is an option to make a Production Cell inactive. If the Production Cell is used in any Bins the system will now display a message indicating the Bins must be deleted before making the Production Cell inactive.
- New Deletion Option in Bins – Bins can now be deleted by Production Cell in Enter & Edit Customer Bins.
- New Flag – Days Added to Order Import Date Requested – When importing VMI Orders the system used to automatically fill in the Current Date as the Date Requested on the Order. There is now a flag that can be set to the number of days you would like to add to the current date to create the Date Requested. This flag is located in Entity & System Flags – Order Entry, Screen 7 of 7.
Graphical Interface Changes
- The system will now remember a user’s grid settings when new columns are added, removed or renamed.
- There is a new user flag “Default New Columns”: Hidden/Visible. The new columns that are added in patches and upgrades will default to the user’s setting.